vsftpd ( 非常安全的文件傳輸協議守護進程) 是Unix/Linux系統中的一個安全快速的FTP伺服器。 在這篇指導教程中,讓我們看看在openSUSE 13.1中怎樣使用vsftpd來配置一個基本的FTP伺服器。

作為root用戶登錄然後輸入以下命令。
# zypper in vsftpd
啟動 vsftpd 服務然後通過設置使它在每次系統重啟時自動啟動。
# systemctl enable vsftpd.service # systemctl start vsftpd.service
為ftp用戶新建一個文件夾。
# mkdir /srv/ftp
創建一個名為 ftp-users 的組。
# groupadd ftp-users
讓我們來創建一個叫unixmen的示例用戶 並設置其主目錄為 /srv/ftp 組為 ftp-users 。
# useradd -g ftp-users -d /srv/ftp/ unixmen
為新用戶設置密碼。
# passwd unixmen
使ftp主目錄 /srv/ftp/ 可以被ftp用戶所訪問。
# chmod 750 /srv/ftp/ # chown unixmen:ftp-users /srv/ftp/
編輯 vsftpd.conf 文件
# nano /etc/vsftpd.conf
設置如下的更改。
[...] #Uncomment and Set YES to enable write. write_enable=YES [...] # Uncomment and Set banner name for your website ftpd_banner=Welcome to Unixmen FTP service. [...] # Uncomment ls_recurse_enable=YES [...] # Uncomment and set YES to allow local users to log in. local_enable=YES [...] # To disable anonymous access, set NO. anonymous_enable=NO [...] # Uncomment to enable ascii download and upload. ascii_upload_enable=YES ascii_download_enable=YES [...] ## Add at the end of this file ## use_localtime=YES
保存並退出文件。
首先 讓我們按如下步驟嘗試登錄FTP伺服器
# ftp localhost Trying ::1:21 ... Connected to localhost. 220 (vsFTPd 3.0.2) Name (localhost:root): unixmen 331 Please specify the password. Password: 230 Login successful. Remote system type is UNIX. Using binary mode to transfer files. ftp>
正如你在上面所輸出的那樣, 我們能夠用unixmen用戶登錄到ftp伺服器。
默認 openSUSE 內置的防火牆不允許遠程系統登錄FTP。所以讓我們允許vsftpd服務通過suse的防火牆。然後我們需要打開: Yast -> 安全性與用戶 -> 防火牆.
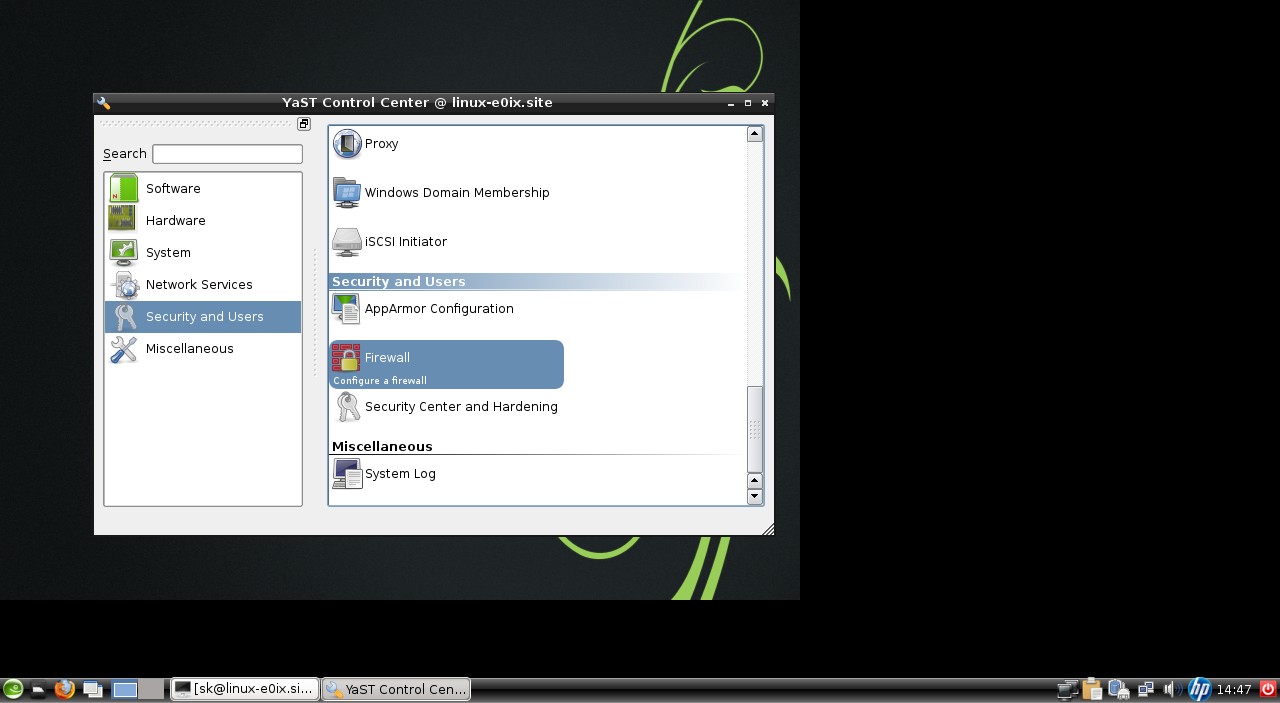
在防火牆界面,進入 允許服務. 在區域選擇下拉框中,選擇 外部區域 在服務允許下拉框中,選擇 vsftpd 伺服器 然後點擊添加。
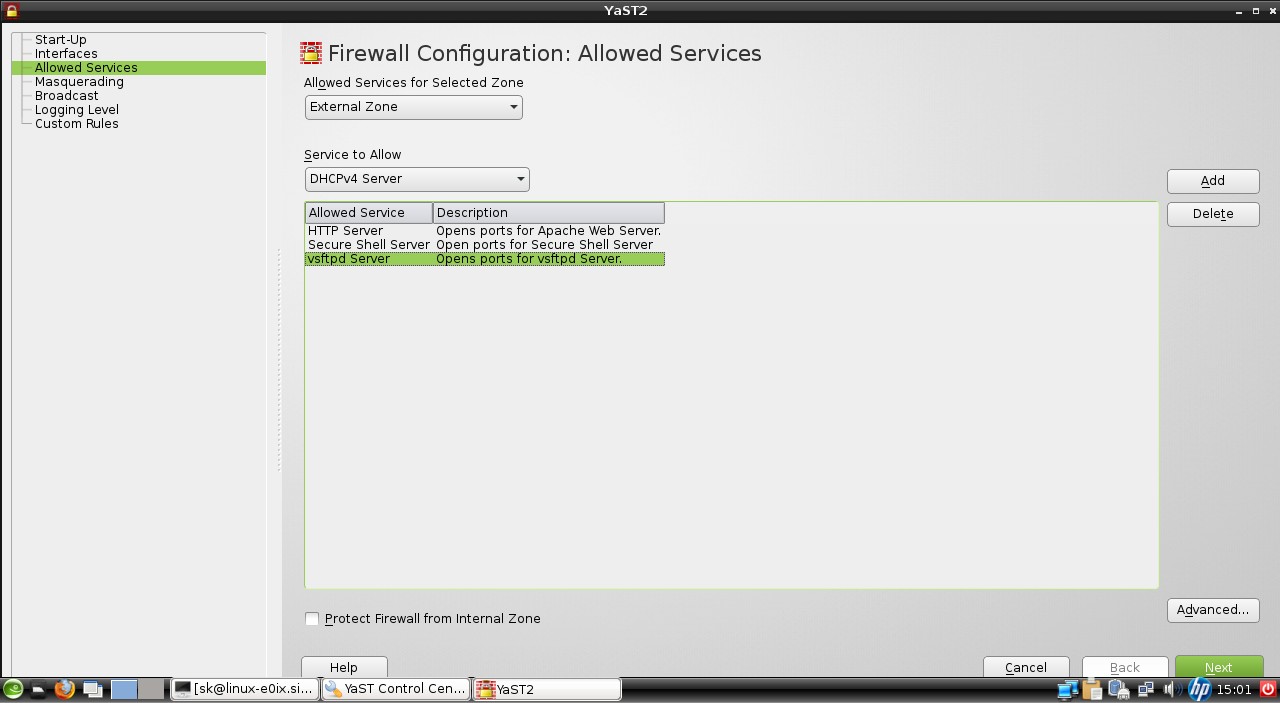
單擊下一步並關閉Yast控制中心
現在嘗試從遠程系統連接FTP。
我試著從我的ubuntu桌面系統登錄FTP伺服器。
sk@sk:~$ ftp 192.168.1.53 Connected to 192.168.1.53. 220 (vsFTPd 3.0.2) Name (192.168.1.53:sk): unixmen 331 Please specify the password. Password: 230 Login successful. Remote system type is UNIX. Using binary mode to transfer files. ftp>
正如你在上面輸出中所看到的,我能夠連接到ftp伺服器。如果不允許vsftpd服務通過防火牆,你將會得到一個連接超時的報錯。
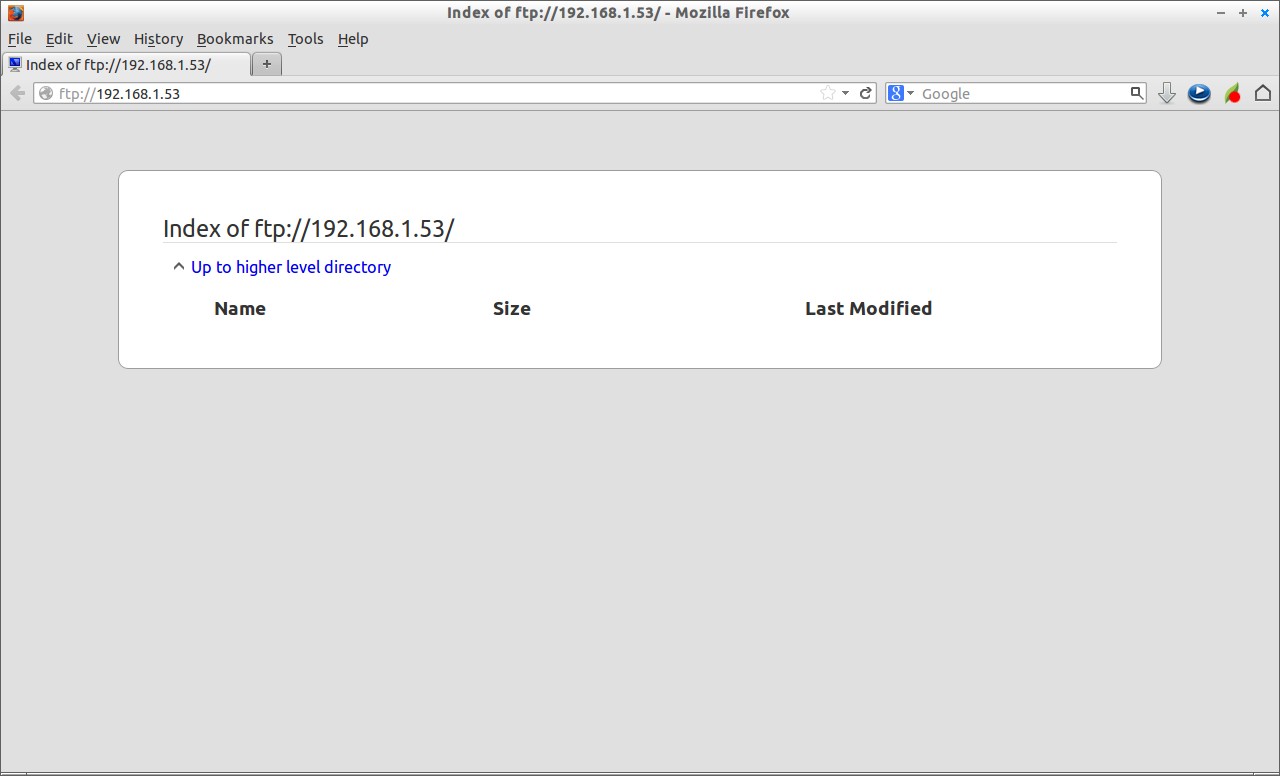
打開你的瀏覽器並導航到ftp://ip-address/。輸入ftp用戶名和密碼。
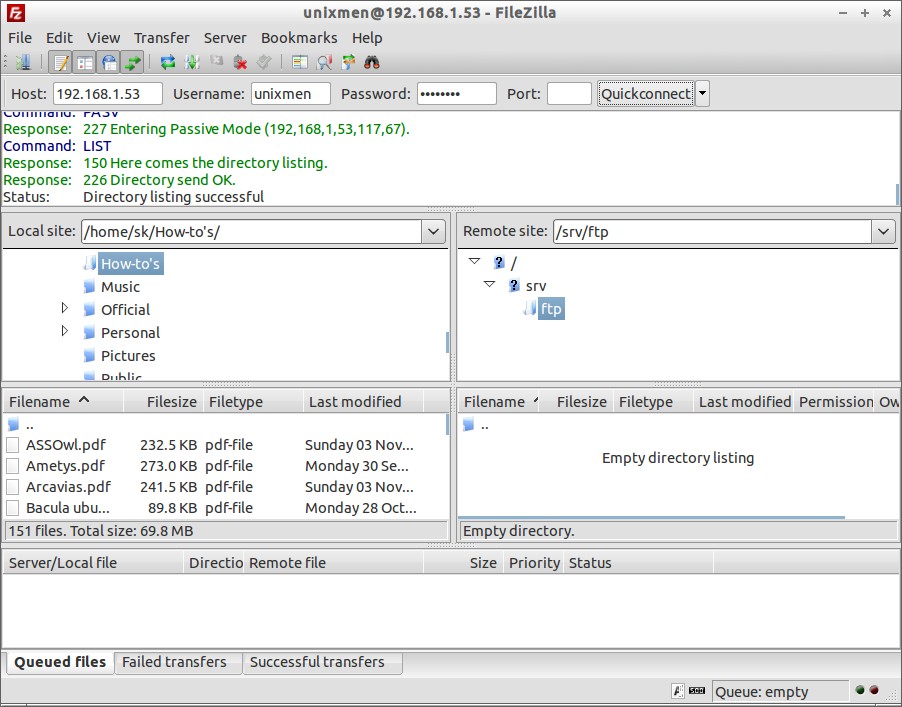
對於新手來說,在命令行模式下工作可能會很煩惱。所以讓我們來安裝一個叫Filezilla的圖形化的FTP客戶端。它可以讓我們登陸FTP變得更加簡單:
幾乎所有的發行版在它們的官方軟體倉庫中都有filezilla客戶端。 為了在基於Linux的系統上安裝filezilla 需要鍵入以下的命令:
在基於Ubuntu的系統中:
$ sudo apt-get install filezilla
在Fedora/Redhat系統中:
$ sudo yum install filezilla
在openSUSE中:
# zypper in filezilla
安裝完fielzilla后打開它。輸入ftp伺服器的IP地址、用戶名和密碼,然後點擊快速連接。
為了增加安全性,你可以通過將用戶添加到 /etc/vsftpd.chroot_list文件中來限制特定用戶對FTP伺服器的訪問。
編輯 vsftpd.conf 文件,
nano /etc/vsftpd.conf
設置如下的更改.
[...] # Uncomment and set YES chroot_local_user=YES chroot_list_enable=YES chroot_list_file=/etc/vsftpd.chroot_list [...]
創建 文件 /etc/vsftpd.chroot_list,
nano /etc/vsftpd.chroot_list
添加你希望能夠訪問FTP伺服器的用戶。我添加了用戶unixmen。
unixmen
重啟ftp服務.
# systemctl restart vsftpd.service
現在你能夠使用chroot_list文件中列出的用戶來連接到FTP伺服器。
如果chroot_list以外的用戶想訪問FTP伺服器,他們將得到如下錯誤提示。
500 OOPS: could not read chroot() list file:/etc/vsftpd.chroot_list ftp: Login failed
就是現在這樣,你的FTP伺服器已經可以使用了,好好享受吧!
via: http://www.unixmen.com/setup-ftp-server-opensuse-13-1/
譯者:zsJacky 校對:Caroline
[火星人 ] 在openSUSE 13.1中配置FTP伺服器已經有1355次圍觀
