本文是分為 5 部分的系列文章的第 2 部分,介紹使用可擴展的開源 Agavi 框架構建輸入表單,並使用 Doctrine 為項目自動生成數據模型,然後將這些模型集成到 Agavi 項目中。
簡介
 |
|
在本系列的第 1 部分中,我介紹了 Agavi 並解釋了一些特性,這些特性讓 Agavi 適合用於構建可擴展、遵從標準的 Web 應用程序。通過使用樣例應用程序 Web Automobiles Sales Platform (WASP),我逐步向您展示了創建新的 Agavi 項目的基礎知識,幫助您理解 Agavi 推薦的文件系統布局,並熟悉 Agavi 的命令行構建腳本。我還介紹了所有 Agavi 應用程序的基礎組件 —— 操作(Actions)、視圖(Views)和路由(Routes)—— 並展示了一些內置的 Agavi 輸入驗證器。
儘管 Agavi 過去常常用於提供靜態內容,但是它也能很好地處理更複雜的情況。在第 2 部分中,您將檢驗 Agavi 處理複雜內容的能力 —— 在接下來幾個小節中,您將學習如何接收、驗證和處理來自 Web 表單的輸入,並將 Agavi 應用程序連接到 MySQL 資料庫。
 |
使用 Agavi 創建表單
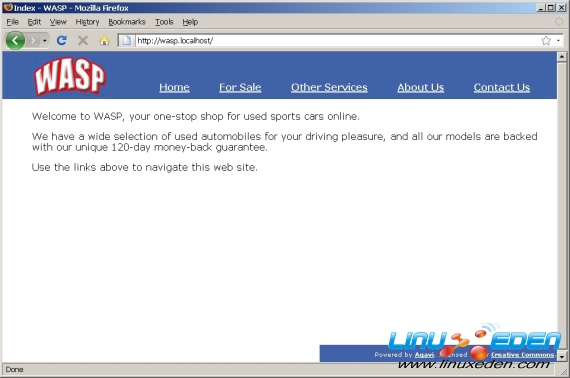
首先,這裡快速瀏覽了 WASP 應用程序的索引頁面(圖 1):
|
|
您在上一篇文章中已經準備好代碼,以處理連接到靜態內容的兩個鏈接。我們繼續前進,開始處理 “聯繫我們” 鏈接。顧名思義,這個鏈接指向一個聯繫表單,通過該表單可以聯繫到汽車交易商。實現這個功能的總體過程與在前一篇文章中構建 StaticContentAction 的過程相似。
首先啟動 Agavi 構建腳本並輸入下列值:
shell> agavi action-wizard ... Module name: Default Action name: Contact Space-separated list of views to create for Contact [Success]: Input Error Success |
這將創建一個新的 ContactAction 和其他 3 個視圖。您已經熟悉 ContactSuccessView 和 ContactErrorView 這兩個標準的視圖,它們根據操作的成功或失敗而顯示。第三個視圖 ContactInputView 是全新的;它是用戶看到的第一個視圖,並且顯示將接受用戶輸入的 Web 表單。
為 $WASP_ROOT/app/routing.xml 文件中的 ContactAction 添加一個新的路由,如 清單 1 所示:
<?xml version="1.0" encoding="UTF-8"?> <ae:configurations xmlns:ae="http://agavi.org/agavi/config/global/envelope/1.0" xmlns="http://agavi.org/agavi/config/parts/routing/1.0"> <ae:configuration> <routes> ... <!-- action for contact form "/contact" --> <route name="contact" pattern="^/contact___FCKpd___1quot; module="Default" action="Contact" /> </routes> </ae:configuration> </ae:configurations> |
完成之後,更新 $WASP_ROOT/app/templates/Master.php 上的主模板,並將主菜單中的 “聯繫我們” 鏈接超鏈接到上面的路由(清單 2):
<!DOCTYPE html PUBLIC "-//W3C//DTD XHTML 1.0 Strict//EN" "http://www.w3.org/TR/xhtml1/DTD/xhtml1-strict.dtd"> <html xmlns="http://www.w3.org/1999/xhtml" xml:lang="en" lang="en"> ... <div id="menu"> <ul> <li><a href="<?php echo $ro->gen('index'); ?>"> Home</a></li> <li><a href="#">For Sale</a></li> <li><a href="<?php echo $ro->gen('content', array('page' => 'other-services')); ?>">Other Services</a></li> <li><a href="<?php echo $ro->gen('content', array('page' => 'about-us')); ?>">About Us</a></li> <li><a href="<?php echo $ro->gen('contact'); ?>"> Contact Us</a></li> </ul> </div> ... |
接下來,在 $WASP_ROOT/app/modules/Default/actions/ContactAction.class.php 中的 ContactAction 類文件內部,通過定義 getDefaultViewName() 和 executeRead() 方法指定 ContactInputView 在默認情況下對所有 GET 請求顯示(清單 3):
<?php class Default_ContactAction extends WASPDefaultBaseAction { public function getDefaultViewName() { return 'Input'; } public function executeRead(AgaviRequestDataHolder $rd) { return 'Input'; } } ?> |
在 $WASP_ROOT/app/modules/Default/templates/ContactInput.php 上使用一個簡單的 Web 表單更新相應的模板文件,如 清單 4 所示。注意,您可以從本文附帶的代碼歸檔中找到該表單的 CSS 規則(見 下載)。
<h3>Contact Us</h3> <form action="<?php echo $ro->gen(null); ?>" method="post"> <label for="name" class="required">Name:</label> <input id="name" type="text" name="name" /> <p/> <label for="email" class="required">Email address:</label> <input id="email" type="text" name="email" /> <p/> <label for="message" class="required">Message body:</label> <textarea id="message" name="message" style="width:300px; height:200px"> </textarea> <p/> <input type="submit" name="submit" class="submit" value="Send Message" /> </form> |
[火星人 ] 學習使用 Agavi 框架構建可擴展 Web 應用程序已經有713次圍觀
