有一天老闆突然找我讓我改富文本(一臉懵逼,不過也不能推啊默默地接下了),大家都知道現在的富文本視頻功能都是隻有上傳鏈接的沒有從本地上傳這一說(就連現在的csdn的也是)於是我找了好多個,最終發現百度的ueditor可以。
經過幾天的日夜,甚至犧牲了週末休息時間開始翻閱資料。。。
廢話不多說,開始教程:
第一步:
去ue官網下載他的源碼
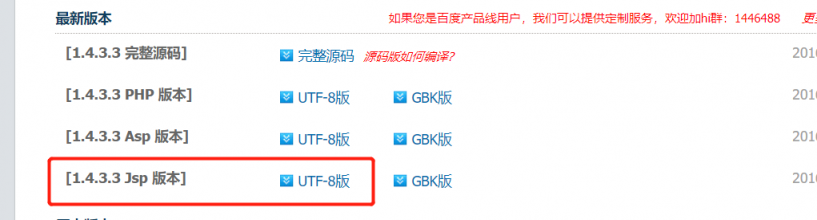
第二步:
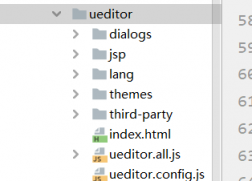
解壓下載的源碼(下載可能會慢,好像需要翻牆下載)
然後打開項目把源碼拖進項目的resources/static中去
第三步
就是重點了
由於springboot現在默認是不支持jsp的所以jap下的controller.jsp 運行後springboot是找不到路徑的,就會出現富文本存在,而上傳圖片或者視頻的地方會顯示(後端未配置)

這裡要說下:下面就你就要把源碼裡面的jsp下有4個jar包,你需要複製到項目中然後add進去,或者你找maven地址也可,但是不建議因為浪費時間。
第四步:由於無法獲取地址,那麼我們就自己寫一個controller進行映射,怕大家懶,我這裡拷貝我的提供使用
@RestController @RequestMapping("/Test") public class UeTestController { /** * 上傳配置:即不走config.json,模擬config.json裡的內容,解決後端配置項不正確,無法上傳的問題 * @return */ @RequestMapping(value = "/ueditor/config",method = RequestMethod.GET) @ResponseBody public String uploadConfig(String action,String noCache) { //注意以下:imageActionName 根據這個ActionName的名字來上傳接口:比如我現在設置的上傳文件接口為下面那個:multipleCarouselFiles //imageUrlPrefix:是【點擊確認之後,加載的資源路徑】所屬服務器中獲取資源 System.out.println("進入config===================="); System.out.println("action="+action+" callback="+noCache); String s = "{ " + " "basePath": "C:/", " + " "imageActionName": "/Test/multipleCarouselFiles", " + " "imageFieldName": "upfile", " + " "imageMaxSize": 2048000, " + " "imageAllowFiles": [".png", ".jpg", ".jpeg", ".gif", ".bmp"], " + " "imageCompressEnable": true, " + " "imageCompressBorder": 1600, " + " "imageInsertAlign": "none", " + " "imageUrlPrefix": "http://localhost:8082/images/upload", " + " "imagePathFormat": "/ueditor/jsp/upload/image/{yyyy}{mm}{dd}/{time}{rand:6}", /* 上傳視頻配置 */ " + " "videoActionName": "/Test/multipleCarouselFiles", /* 執行上傳視頻的action名稱 */ " + " "videoFieldName": "upfile", /* 提交的視頻表單名稱 */ " + " "videoPathFormat": "/ueditor/jsp/upload/video/{yyyy}{mm}{dd}/{time}{rand:6}", /* 上傳保存路徑,可以自定義保存路徑和文件名格式 */ " + " "videoUrlPrefix": "http://localhost:8082/images/upload", /* 視頻訪問路徑前綴 */ " + " "videoMaxSize": 102400000, /* 上傳大小限制,單位B,默認100MB */ " + " "videoAllowFiles": [ " + " ".flv", ".swf", ".mkv", ".avi", ".rm", ".rmvb", ".mpeg", ".mpg", " + " ".ogg", ".ogv", ".mov", ".wmv", ".mp4", ".webm", ".mp3", ".wav", ".mid"]/* 上傳視頻格式顯示 */ }"; return s; } /** * Ueditor上傳文件 * 這裡以上傳圖片為例,圖片上傳後,imgPath將存儲圖片的保存路徑,返回到編輯器中做展示 * @param file * @return */ @RequestMapping(value = "/multipleCarouselFiles",method = RequestMethod.POST) @ResponseBody public String uploadimage(@RequestParam("upfile") MultipartFile file, HttpServletRequest request, HttpServletResponse response) { //服務協議 String Scheme =request.getScheme(); //服務器名稱 String ServerName= request.getServerName(); //服務器端口 int Port= request.getServerPort(); String url=Scheme+"://"+ServerName+":"+Port; Results results=new Results(); //判斷非空 if (file.isEmpty()) { return "上傳的文件不能為空"; } try { //1、先獲取jar所在同級目錄 File path = new File(ResourceUtils.getURL("classpath:").getPath()); if(!path.exists()){ path = new File(""); } System.out.println("獲取jar所在同級目錄 path:"+path.getAbsolutePath()); //2、如果上傳目錄為/static/images/upload/,則可以如下獲取: File upload = new File(path.getAbsolutePath(),"static/images/upload/New_img/"); if(!upload.exists()){ upload.mkdirs(); } System.out.println("上傳目錄為/static/images/upload/中---upload url:"+upload.getAbsolutePath()); //測試MultipartFile接口的各個方法 System.out.println("[文件類型ContentType] -:"+file.getContentType()); System.out.println("[文件組件名稱Name] -:"+file.getName()); System.out.println("[文件原名稱OriginalFileName] -:"+file.getOriginalFilename()); System.out.println("[文件大小] -:"+file.getSize()); System.out.println(this.getClass().getName()+"圖片路徑:"+upload); // 如果不存在該路徑就創建 String uploadPath=upload+""; File dir = new File(uploadPath + file.getOriginalFilename()); // 文件寫入 file.transferTo(dir); //在開發測試模式時,得到的地址為:{項目根目錄}/target/static/images/upload/ //在打包成jar正式發佈時,得到的地址為:{發佈jar包目錄}/static/images/upload/ results.setMessage("上傳單個文件成功"); } catch (Exception e) { e.printStackTrace(); results.setMessage("上傳單個文件失敗"); } String result = ""; if(!file.isEmpty()) { String originalFileName = file.getOriginalFilename(); // 這裡寫你的文件上傳邏輯 // String imgPath = fileUtil.uploadImg(file); String imgPath = "/New_img/"+originalFileName; result = "{ " + " "state": "SUCCESS", " + " "url": "" + imgPath + "", " + " "title": "" + originalFileName + "", " + " "original": "" + originalFileName + "" " + "}"; } return result; } }
下面附上一個老哥給我發的上傳文件用的一個類Results
import com.fasterxml.jackson.annotation.JsonProperty; /* * ueditor 使用類 * */ public class Results { private Object Data; private String Message; private boolean Status; @Override public String toString() { return "Results{" + "Data=" + Data + ", Message='" + Message + ''' + ", Status=" + Status + '}'; } @JsonProperty("Data") public Object getData() { return Data; } public void setData(Object data) { Data = data; } @JsonProperty("Message") public String getMessage() { return Message; } public void setMessage(String message) { Message = message; } @JsonProperty("Status") public boolean isStatus() { return Status; } public void setStatus(boolean status) { Status = status; } }
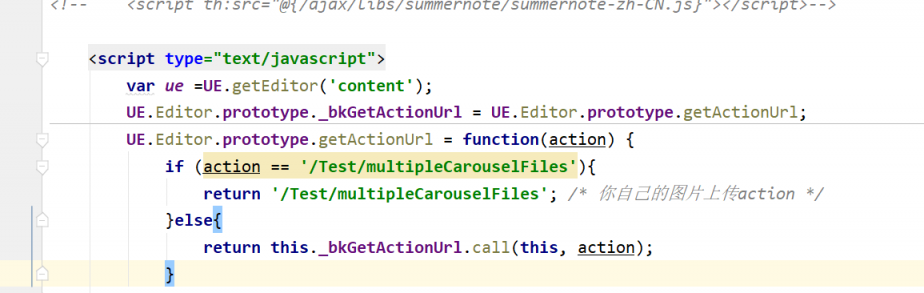
下面就要修改ueditor中最重要的映射地址位置(ueditor.config.js)也就是說他為什麼能加載你寫的testcontroller就是這個地方在起作用(附圖):
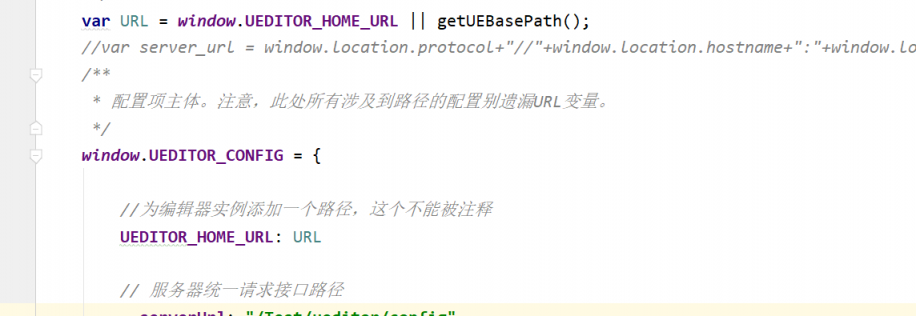
如果你從上面跟我路徑一直,可以直接複製我的地址
此時你在運行項目就會進入自己寫的controller
上面其實我都一步寫好了,其實在我做的過程中還遇到了
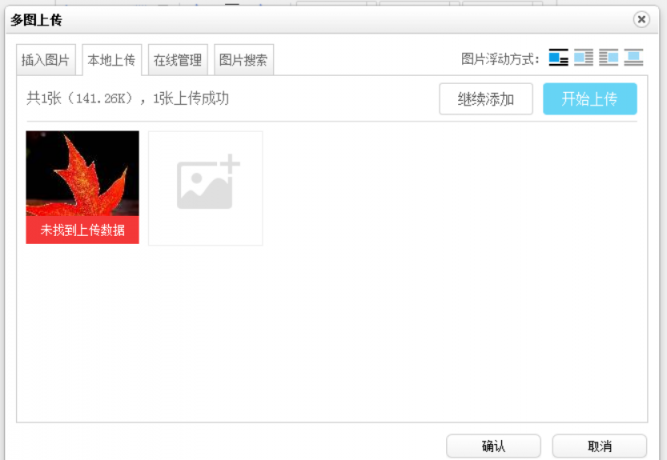
(圖是我找的,但是問題一模一樣),具體什麼原因就是因為沒有配置好圖片上傳的路徑
說到這我要提一下你引入富文本的地方,需要做一個這個配置
其他位置不要動就可以,到這夠詳細吧,做這個真是做的我腦袋都大了,好在有一個老哥幫了我一把,非常感謝,還有什麼問題留言就可,看到就會回
[lousu-xi ] 詳解springboot整合ueditor踩過的坑已經有256次圍觀
